Alright, this isn't too hard, just need to know how to image edit a little bit

. First, I highly recommend you get a pic program that can scale the size of your picture, not just the area of it, (I use
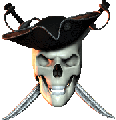
Brush Strokes since it's like paint, but you can quickly import, rescale, and export pics. Anyways, say I wanted this pic to become a wall texture in one of my maps

That's a little to big, Unreal Ed can't handle photo's of random sizes. So, we need to make this pic 256x256 by editting it's properties in Brush strokes image editor (Picture -> Change Size), if you are using brush strokes, check the "Stretch to Fit" option in the change size box. And now you should have something like this:

Ah, much better now. Now, save you're picture.
Make sure it is Bitmap format, (.bmp) It can be anything like true color bitmap, 256 color bitmap, 16 color bitmap ect but it MUST be a bitmap! Then, go into old Unrealed and into you're texture browser. To to the top and click Import, then select the destination you saved your picture in. Your pic isn't coming up eh? You need to change the .pcx into all files in the selection bar
then you should see you're picture. Now, hit import and make up a name for it's package (e.g. AwesomeWalls) You can leave groups blank if you only plan on putting a bunch of textures in without any organization. Then name the pic on what you want it to be.
Do not put a space in the name! Unrealed is buggy with spaces in the name and you won't be able to click on it! You can select it to be mipmap or non mipmap, non mipmap makes it looks sharper, but takes up alot more disk space. Mipmap compresses it (Mipmap checked is ideal for putting screenshots in you're map.) Now it should be inside you're own custom made texture package! And, last but not least
BE SURE TO SAVE IT!